Saturday, February 22, 2020

Model Horse Halters DIY

Making model horse halters is really simple and doesn't really require a pattern.


Supplies

  • Ribbon 1/8 inch preferably ribbed or grosgrain
  • jump rings 6 mm and 4 mm jump rings
  • Buckles I like B5
    • You can make buckles with wire but it's a bit more difficult
  • Halter rings I use HD30s
    • You can use 6 mm rings for this part, it just doesn't look as nice
  • Lead rope hooks I use HD2s
    • You can also use lobster clasps if they are really small
  • Embroidery Floss
  • Tacky Glue
  • Clamps of some form
  • Model horse to test it on


Directions

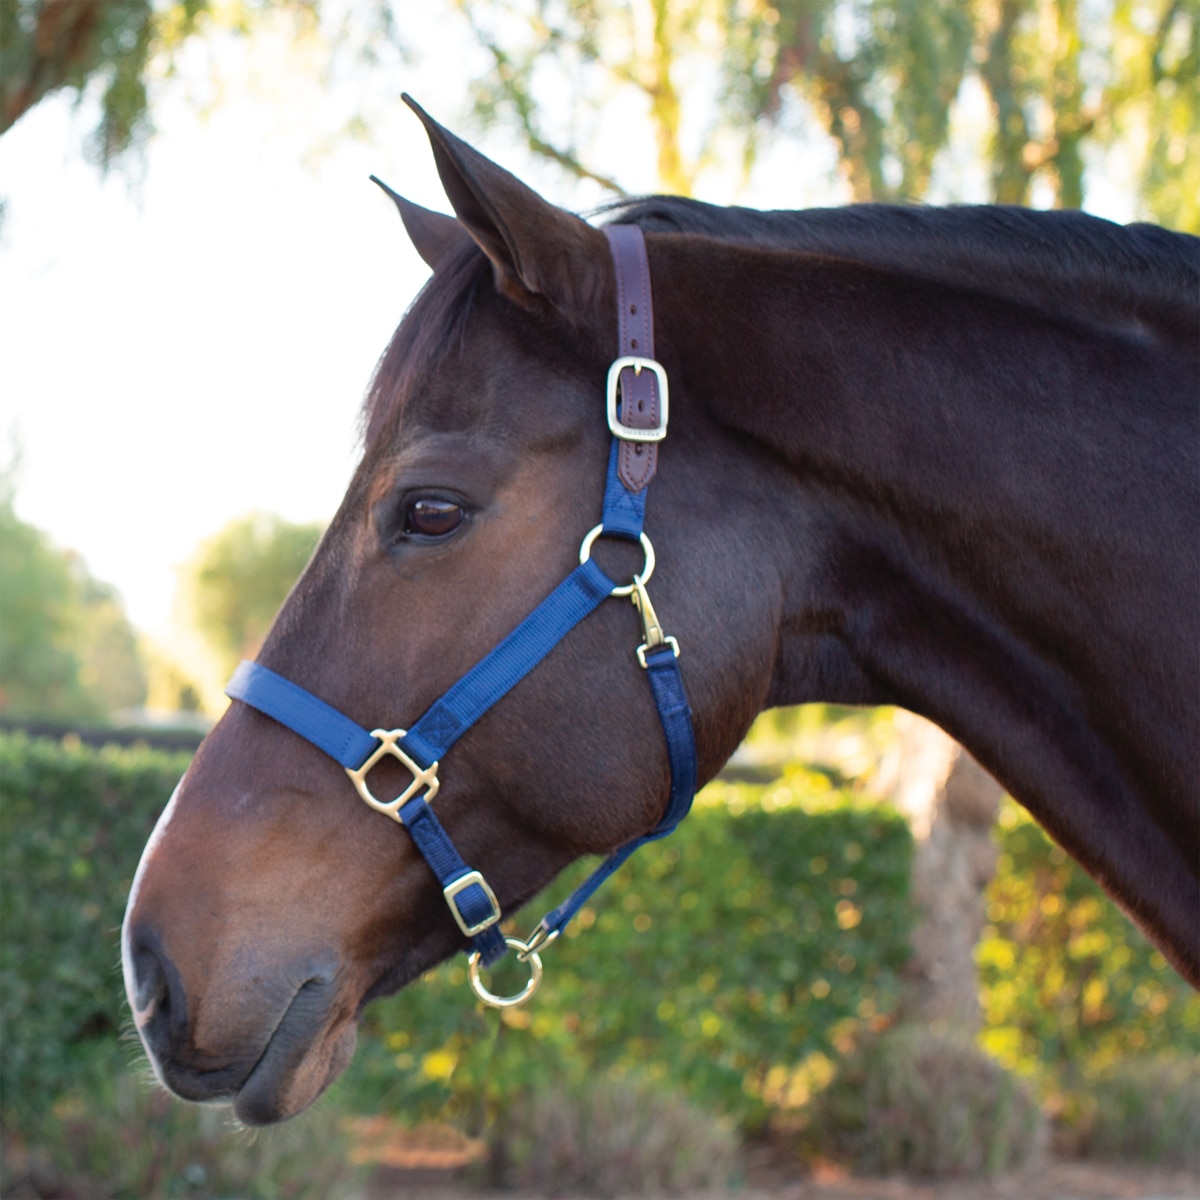
Refer to these as reference:
Image result for parts of a halterImage result for horse halter

1. Measure a piece across the top of the nose. It should be long enough to touch both corners of the mouth. Give it a little extra to fold over as tabs. Then put it into the halter rings as shown (you can substitute jump rings for halter rings).

2. Measure out the cheek pieces so that they are between the corner of the mouth and under the ear. Put one end in the top halter ring slot.

3. Put jump rings on the other end of each cheek piece as shown.


4. Next attach a long piece to the left back jump ring as shown. Make sure the piece is long enough to go behind the horses ears and reach the other jump ring.

5. Cut a short piece of ribbon glue on buckle as shown.


6. Glue the other end around the right back jump ring as shown. You can slip the long strap through the buckle and try it on.

7. Interlink two jump rings (4mm preferably). Measure and cut out the bottom nose strap so that the halter will fit. It is better to be a little bigger than too small. Put the ribbon through one of the jump rings.


8. Put one end of the strap through the 3rd halter slot as shown.

9. Bring the bottom of the noseband around so that the side of the glue flaps faces the inside and put though the last halter slot.

10. Measure out a throat latch. Glue into the bottoms of the back jump rings as shown.

11. Measure out the connecting strap leaving a lot of slack. Glue one end through the empty interlocked ring. Glue the other end around the throatlatch so that it can slide as shown. And there you have it, a fancy new halter.


Saturday, February 15, 2020

New Products!

Everything is pink because it's February and I feel like having lots of pink things.


So I made groom boxes for Traditional, Classic, and Schleich scale of course!


Then bucket2020 was officially launched! I have learned so much about CAD in the last year, I felt the need to really improve these. Gone is the weird butt crack. Now it's a nice smooth back while still having the taper so that they stack.


Then there is the triumph of these hook on buckets. Just like the real thing but in miniature!


There's a really important difference between the on the left and the one on the right. The one on the left was made with Fusion360 (a startup/ hobbyist license is FREE!) and the one on the right is with tinkercad. 


And finally here's a picture of Soup. He loves the yard.


Sunday, February 2, 2020

Updates

While I have not been a chatty blogger, things have been getting done at a relatively good pace. I have made lots of jump blocks. They are printed with a brim that ensures the print doesn't come unstuck and move around which causes a failure.That is then removed and the edges are cleaned up. The scraps are recycled and will someday become a new spool of filament.


I also painted lots of posts. Key tip: Prime them first. I like Rustoleum primer because it works well and not because I worked there for a few years.


I got around to quality testing some features for cool new stuff (spoilers). This hook needs beefing up otherwise it can be bent and fall off. :0


One of my favorite things is R&D and I'm super happy that I have a little time to work on that. One of the most valuable assets of 3D printing is allowing for very complex designs that can then be printed in one or two pieces. 

Look out for the pink thing, it will be announced in a few weeks. And it will be epic!

And finally after a rocky start, Soup is settling in well and has found himself a cool toy box bed.


Upgrading a Wreath, horse girl style