Designing a Feed Pan
1. Open fusion 360
Left click: Selection box
Right click + drag: Poupup menu with some options
Scroll middle wheel: zoom in and out
Press middle wheel: move around screen
Press middle wheel + press shift: rotate screen (also accomplished by moving box in the top right corner)
2. Click on the sketch button
3. Choose the plane to work on, the bottom one.
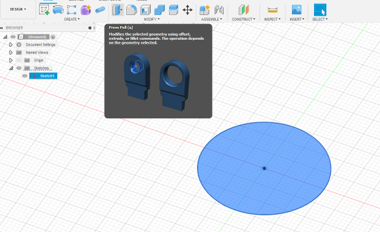
4. Sketch a 30 mm circle. Type in diameter to lock it.This makes it easier to change if you decide you want it smaller or larger later on. Select finish sketch. At this point there are two different ways I'm going to show, A and B
Method A: Extrusion
1. Click the press/pull button and extrude the circle with a taper of 15 deg to 10 mm . This gives it a slight slant out to make the pan's shape.
This is an easier way, but it is also harder to control the size of the top of the pan (and after reading this, Anthony said, "It's actually not hard you just have to do some math").
Method B: Offset Plane
1. Go to the top and select Construct. From the drop down menu select offset plane
2. Set the height of the offset plane to 10 mm.
3. Click create sketch and select your new plane.
4. Sketch a 35 mm circle with the same center point as the first. Finish sketch.
5. Go to the Create drop down menu and select Loft.
6. Chose your two circles as the points to be lofted.
This method more carefully controls the size of the top circle with less math.
Continue Main method:
5. Click the shell button then click the top circle.
6. Set the shell width to 1 mm.
8. Select Fillet and round the bottom of the pan 1 mm.
7. Tada a feed pan!
These skills can be applied to just about every shape and item you can imagine. The best way to learn more is to just try stuff. Sometimes things will work and sometimes they won't. Happy making!


No comments:
Post a Comment