Thursday, May 30, 2019

Expected Arrivals

My amazon order showed up today... In it was all my new PURPLE!!! shipping envelopes. Without those envelopes I've got a pile growing of small model horse tack items that are destined for etsy. I'm also waiting on pla filament for my new hobby/ making stuff for model horse. My boyfriend was telling me how he could make stuff with his 3D printer and how it would be super useful and initially I was like, "no, I just can't think of any way that would really help...". Boy was he thrilled to hear, "you're right", when I realized I could print detailed things in as small as 1:9. So now I'm joining him in his hobby and thus I really really really cannot wait for my pla to come in.... So many big plans!!!!


So I got the mail today and I'm impressed with how fast USPS shipping is. Not only did I get my silver and turquoise pla,
My Rio Rondo order also arrived!!!!!

And from Amazon? 

Purple shipping envelopes!

And a rainbow of PLA!!!!


Time to get stuff done! Look for an update about my secret project and some really exciting new stuff in my etsy shop! I'll be cranking out .... all day tomorrow to get it ready for sale!!!


Monday, May 27, 2019

DIY Fringed Breast Collar

While I'm still waiting for my smaller bubble mailer envelopes to arrive, I've gotten through a backlog of smaller projects. I'm also waiting on a rio rondo order and an amazon order that is going to upend the entire model horse world... maybe not that big, but I am in the process of making something really cool and original.

But today's tutorial will focus on making a breast collar for a traditional model horse. Feel free to scale down for classics too.


My pattern is here:

I accidentally did the center piece upside down but otherwise this shows my orientation of the breast collar.

Tools:
  • Scissors
  • x acto knife (If you're a kid, make sure to get a parents help to use this)
  • needle nose pliars
  • glue 
  • clamps
Supplies:
  • tooling leather (small amount)
  • suede leather in desired color
  • leather lace
  • 1 large jump ring (for center)
  • 2 small jump rings
  • 3 buckles (rio rondo size 3/32)
  • 2 large D rings
  • 1 small open D ring
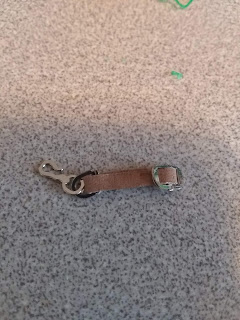
  • 1 hook thing

Directions:
1. Cut out the pattern in the tooling leather.

2. Bend the tabs and skive down the leather a bit for a better fit.
3. Glue the two interior tabs around the large jump ring as shown.

4. Glue on a large D ring to each end of the shoulder pieces.
5. Cut a 3" piece of leather lace. Skive. Bend over about a 1/2" tab. Glue around the center jump ring as shown.

6. Cut two 3 1/2" pieces of leather lace, skive. Attach a buckle to each as shown.

7. Thread a small jump ring onto each as shown. Loop through the large D ring, then loop back through the small jump ring. Buckle. The buckle should be facing the good side of the leather. 

This one was actually done backwards but hopefully you get the idea.


8. Cut out a 2 3/4" piece of leather lace. Bend it into thirds. Put the hook on the small open d-ring, then glue to one side of the piece. Glue a buckle on the other side. Buckle onto center piece of leather lace with the hook facing up.

9. Cut out pieces of suede that are somewhat larger than your breast collar shoulder pieces, they should be longer on the bottom as shown. Glue to the back of the breast collar shoulder pieces as shown.
10. Even them out so that they are the same size and length. Trim off any excess on the top.
11. Glue the center piece to the leather lace as shown. Cut small fringes along trying to keep an even size. You've finished!

Enjoy!


Wednesday, May 22, 2019

Halters gunna halt...er?

So I've got some nice halters that I'll be adding to my etsy shop in the upcoming days. They're finished and the leather ones have been sealed with some tankote. I'm just waiting for my new packaging to arrive from the great Amazon... Turns out the shipping envelopes are cheaper and you can buy them more in bulk and most importantly, they're purple. Here's a sneak peak at what will be showing up in my shop. If you visit my blog, you'll notice I've added a coupon to your right! Yes you can use it on any of these beauties!


A brown leather halter and lead,


A black leather halter and lead,

And a blue/purple reversible halter and lead. (I'm going to have to work on making it sturdier. I feel like the buckles in the top are too small and finicky.)


Friday, May 10, 2019

HBK7 is finished

HBK7 is finally finished. It took way longer to make than I expected, partially due to tooling, partially due to learning how to weave a cinch, and mainly due to an overwhelming lack of motivation. But it's finished! Next I guess I'll be moving on to making HBK8 which will either be my first english saddle because I have everything but the courage necessary to make that or a western set that will need another trip to rio rondo before it starts. I guess we'll know soon enough.

Edit: HBK7 has sold!
 But here is a bunch of pictures of it being modeled on my Max, which I really need to find a replacement for because he needs to be retired to protect his tummy which I lucked out in getting signed by the owner! (Interestingly enough I know the person who owned Fleet Street Max's sire which just goes to show how connected the horse world is. If you don't know somebody, chances are somebody you know does.)


Thursday, May 2, 2019

HBK7: Putting the Seat On

Well, the finishing touches on the saddle are really just everything else that needs to be glued on/ stabbed through in the case of the conchos. I still need to actually finish embelishing the cinch which will match the dark blue theme of the saddle. I also still need to make a nice bridle to go with the set. But onto the saddle making process.

First I glued the tree on.

Next came the stirrups. (I have forgotten this step in the past and I have had to remove the seat of a saddle just to add stirrups).

Next I glued the seat onto the lower skirt. It is a very good idea to measure both sides of the seat to make sure it is not only centered behind the horn in the front, but also centered in the back. Repeat after me, "No crooked saddles". Fixing crookedness is way harder than making sure it's not crooked in the first place.


And while I was putting this saddle together, I noticed a ominous scratching sound at my window. All thanks to this little guy. I've named him Scratchy, but I don't know if he'll be back.


Upgrading a Wreath, horse girl style